.jpg) |
| My first batch of jars using the method below. |
After seeing all the pretty colored Mason jars online, I decided I needed some colored jars for my new Mason jar bird feeders (see my previous blog post). To test the method that I found online, I purchased some jars from a local discount store ($8.79 for a dozen "no name" pint jars) because I didn't want to ruin any of my pretty Mason and Kerr jars on an experiment. I was happy with the ease of the process and surprised at how good they turned out!
Here's what you need:
- Food color (not the gel type, just the old fashioned cheap stuff)
- Water
- Disposable bowls (easier clean up)
- Plastic spoons
- Modge Podge (Glossy - Matte will not turn out as well)
- Paper towels for clean up
- Aluminum Foil
- Wax or Parchment Paper
- Two cookie sheets
- Preheated oven to 200 degrees (F)
 |
| Red and Green Finished Jars. |
For two pint jars (if you wish to make more, just double all the ingredients below):
First, line one cookie sheet first with aluminum foil and then add a layer of wax or parchment paper. This is because the mixture will seep through the paper in places and the foil protects your cookie sheet. I also threw some on the second cookie sheet just as a safety precaution. I use two cookie sheets instead of one. You'll be glad you used two sheets - it's just easier when you flip the jars.
 |
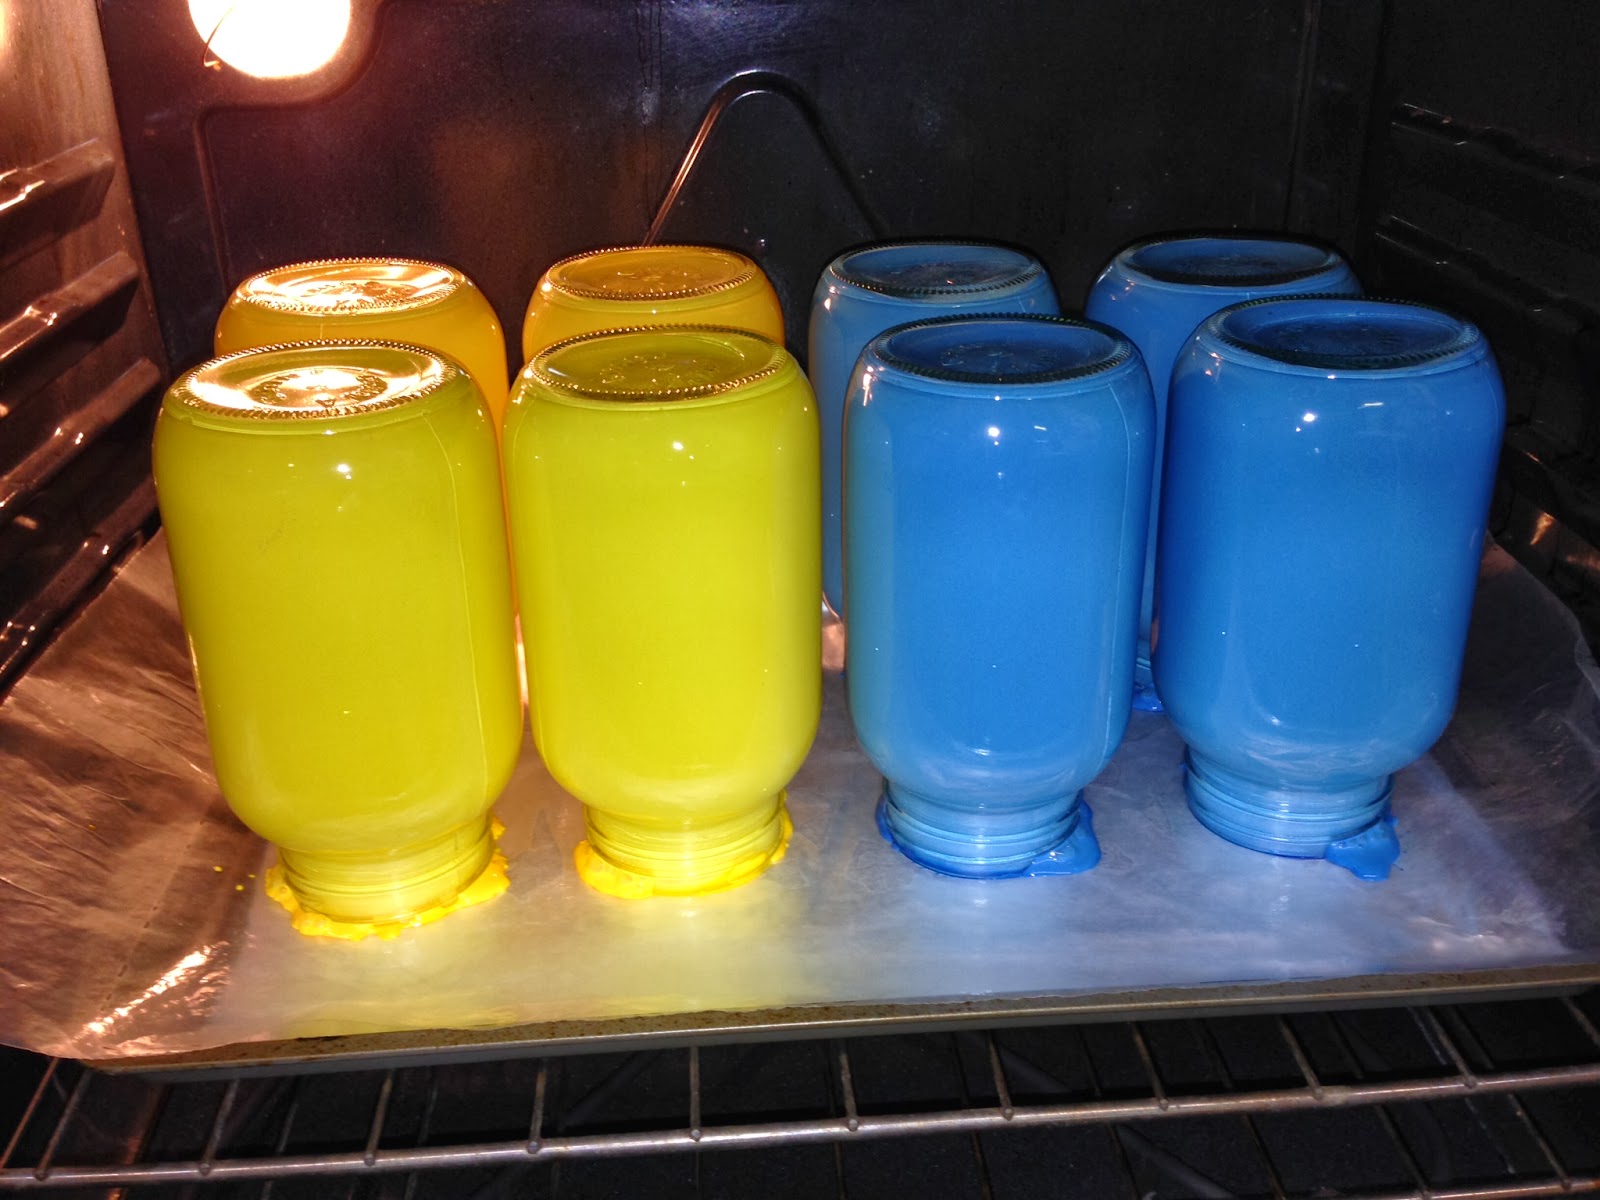
| Notice the initial pastel colors. |
I suggest that you mix the water and food color in a disposable bowl. You will use 18 to 25 drops of food coloring (or more if you wish for it to be darker in color, just tint it until you get the color you wish) and two teaspoons of water. Mix well. Next, add four teaspoons of Modge Podge and stir until well mixed. Please note that the color will look pastel in color - be patient!
 |
| Another batch in progress. |
Pour about half the liquid in a pint jar and roll it around until all the sides are covered. Tilt the jar upside down over some paper to save your table or counter top. Make sure you keep rolling it around until all the sides are covered all the way to the jar opening. Hold the jar upside down over the bowl and let it drip until it doesn't have a lot of the mixture coming out of it.
 |
| Combining them as I go. |
|
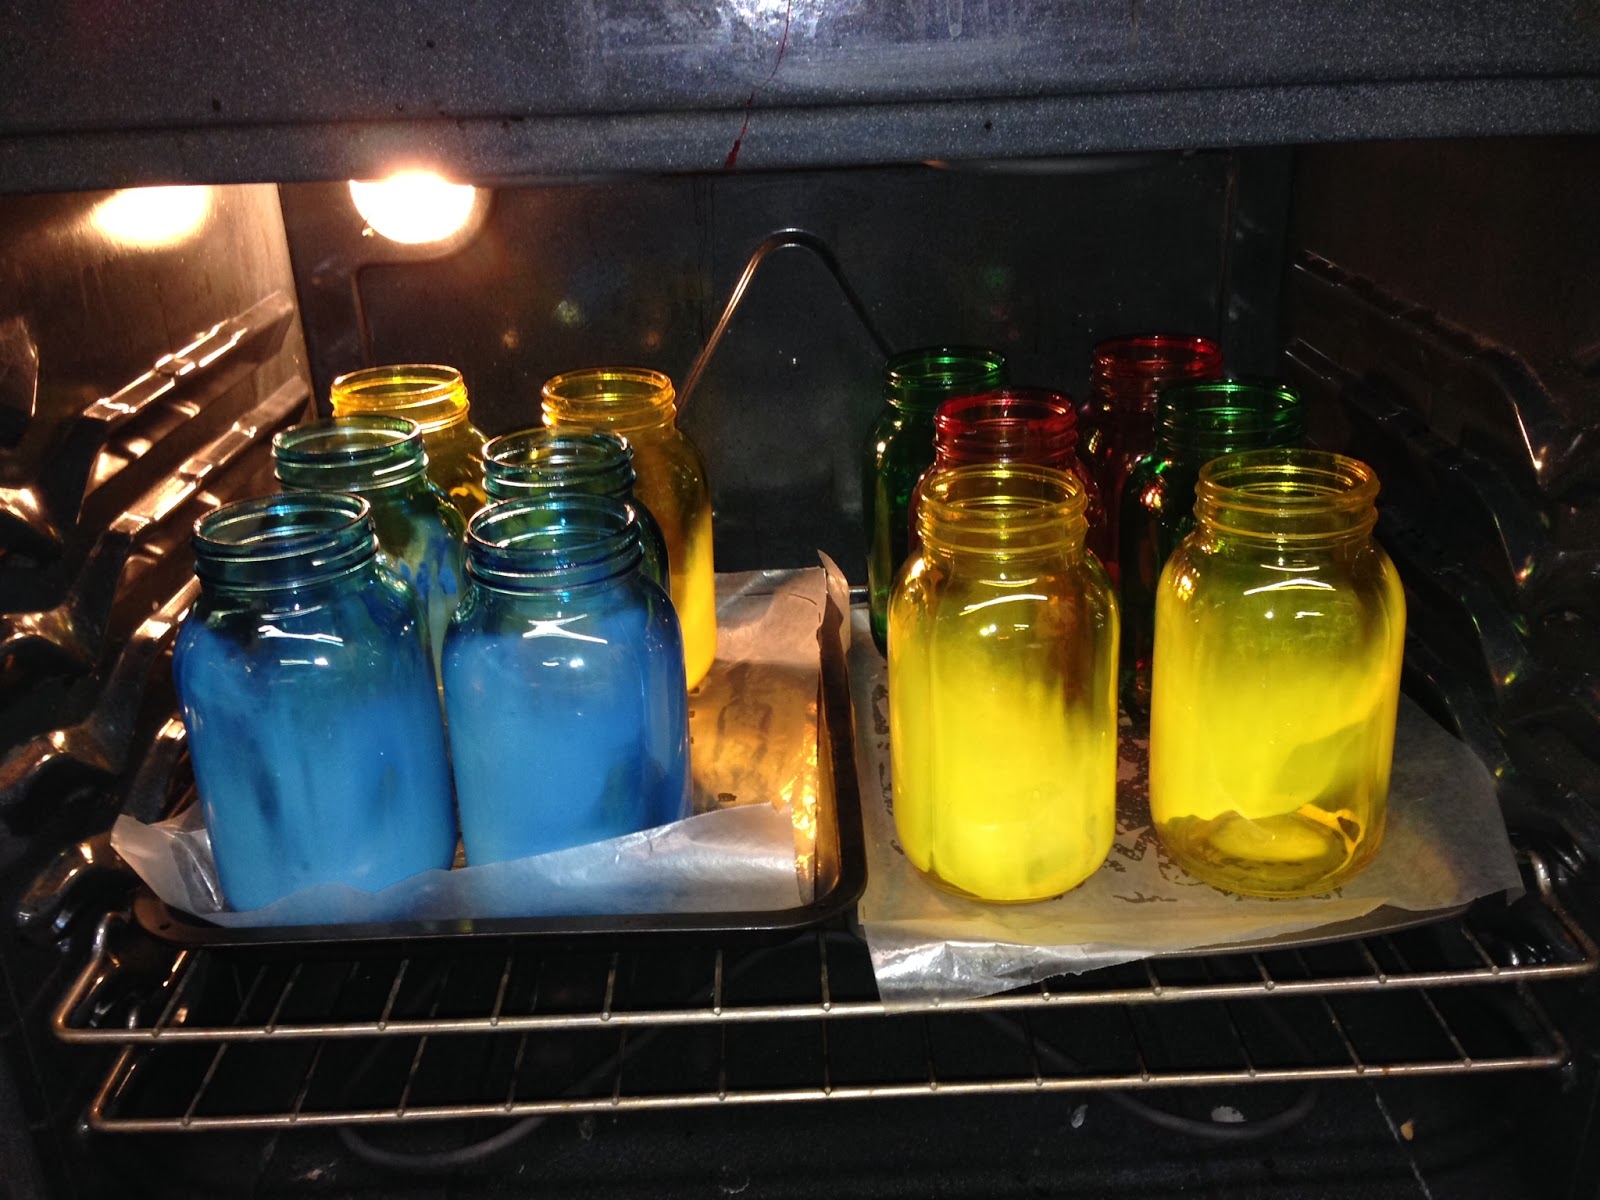
Place the jar upside down on your lined cookie sheet (continue making other jars if you are doing multiple batches). Slide the cookie sheet into the oven for 3 to 5 minutes. Remove from the oven and using a cloth or mitt, pick up each jar and wipe the outside with a paper towel (carefully) to remove the extra mixture so you don't have a bunch of clumpy stuff on the rim of the glass. Set the wiped jar right-side-up on the second cookie sheet (with a fresh barrier if you wish). When you've wiped all your jars, put them into the oven again and check them every 20 minutes. You will notice the color changing very quickly from a pastel color to a clear tint - it's really neat to watch it change over time! When they are completely dry and the glass becomes a clear (but tinted your new color - even in the very bottom), you can remove them from the oven and let them cool. Make sure it is completely dry.
If you jars are the color you're wanting, when they have cooled and set for a few hours, you are done. However, if you are going to use the jars (like I am), you must add a clear glass sealant (glossy finish), available at your local craft store. I recommend letting your fresh jar sit overnight before adding the sealant, and allow your jar to cure as directed on the sealant's instructions. I am using Tree House Studio Clear Acrylic High Gloss Sealant which dries fast and does not run.
Update: I finished my jars, added my chick feeder base and copper wire to make my feeders. Here's what they look like - I think they're keepers!
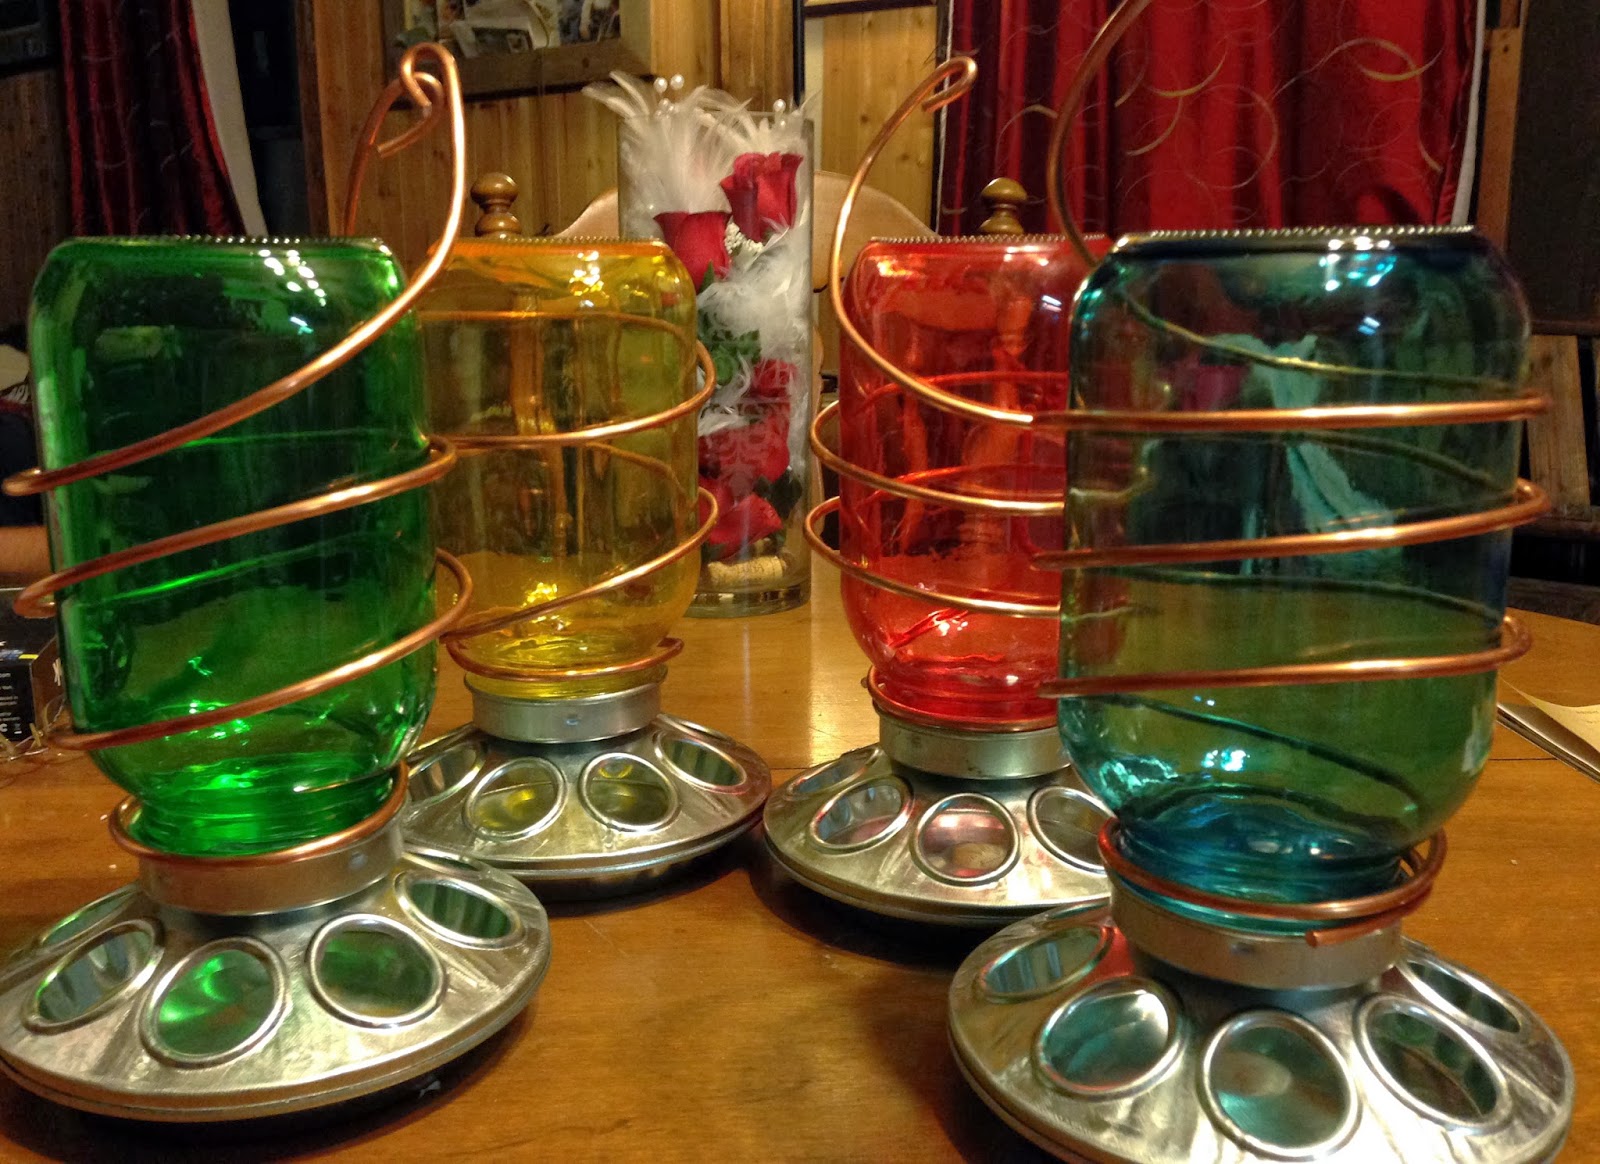.jpg) |
| The finished products. I also did these originally in clear, and it took my backyard birds about 3 minutes to begin eating from them! |
No comments:
Post a Comment